
FAT OR THIN? THE QUESTION OF CONTACT PATCHES AND GRIP
If there’s one question guaranteed to promote argument and counter argument, it’s this : do wide tyres give me better grip?
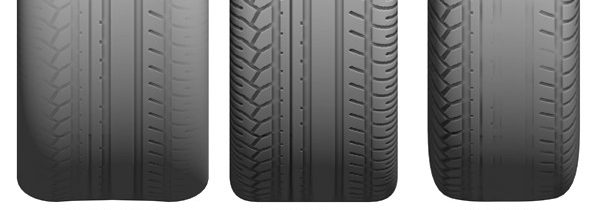
Fat tyres look good. In fact they look stonkingly good. In the dry they are mercilessly full of grip. In the wet, you might want to make sure your insurance is paid up, especially if you’re in a rear-wheel-drive car. Contrary to what you might think (and to what I used to think), bigger contact patch does not necessarily mean increased grip. Better yet, fatter tyres do not mean bigger contact patch. Confused? Check it out:
Pressure=weight/area.
That’s about as simple a physics equation as you can get. For the general case of most car tyres travelling on a road, it works pretty well. Let me explain. Let’s say you’ve got some regular tyres, as supplied with your car. They’re inflated to 30psi and your car weighs 1500Kg. Roughly speaking, each tyre is taking about a quarter of your car’s weight – in this case 375Kg. In metric, 30psi is about 2.11Kg/cm².
By that formula, the area of your contact patch is going to be roughly 375 / 2.11 = 177.7cm² (weight divided by pressure)
Let’s say your standard tyres are 185/65R14 – a good middle-ground, factory-fit tyre. That means the section width is 18.5cm side to side. For a section width of 185, the actual tread width will be something like 14.8cm (section width is the widest part of the tyre – tread width is always slightly narrower) So your contact patch with all these variables is going to be about 177.7cm² / 14.8, which is 11.9cm. Your contact patch is a rectangle 14.8cm across the width of the tyre by 11.9cm front-to-back where it sits ‘flat’ on the road.
Still with me? Great. You’ve taken your car to the tyre dealer and with the help of my tyre calculator, figured out that you can get some swanky 225/50R15 tyres. You polish up the 15inch rims, get the tyres fitted and drive off. Let’s look at the equation again. The weight of your car bearing down on the wheels hasn’t changed. The PSI in the tyres is going to be about the same. If those two variables haven’t changed, then your contact patch is still going to be the same : 177.7cm²
However you now have wider tyres – the section width is now 22.5cm instead of 18.5cm. Meaning the tread width will be around 18.0cm instead of 14.8cm. The same contact patch but with wider tyres means a narrower contact area front-to-back. In this example, it becomes 177.7cm² / 18.5, which is 9.6cm (compared to 11.9cm with the narrower tyre).

And there is your ‘eureka’ moment. Overall, the area of your contact patch has remained more or less the same. But by putting wider tyres on, the shape of the contact patch has changed. Actually, the contact patch is really a squashed oval rather than a rectangle, but for the sake of simplicity on this site, I’ve illustrated it as a rectangle – it makes the concept a little easier to understand. So has the penny dropped? I’ll assume it has. So now you understand that it makes no difference to the contact patch, this leads us on nicely to the sticky topic of grip.
The area of the contact patch does not affect the actual grip of the tyre. The things that do affect grip are the coefficient of friction of the rubber compound and the load on the tyre. As far as friction is concerned, the formula is relatively simple – F=uN, where F is the frictional force, N is the Normal force for the surfaces being pressed together and u is the coefficient of friction. In the case of a tyre, the Normal force basically stays the same – mass of the car multiplied by gravity. The coefficient of friction also remains unchanged because it’s dependent on the two surfaces – in this case the road and the tyre’s rubber.
The coefficient of friction is in part determined by the rubber compound’s ability to ‘key’ with the road surface at a microscopic level.

This explains why you can slide in a corner if you change road surface – for example going from a rough road to a smooth road, or a road surface covered in rain and diesel (a motorcyclist’s pet peeve). The slide happens because the coefficient of friction has changed.
SO DO WIDER TYRES GIVE BETTER GRIP?
If the contact patch remains the same size and the coefficient of friction and frictional force remain the same, then surely there is no difference in performance between narrow and wide tyres? Well there is but it has a lot to do with heat transfer. With a narrow tyre, the contact patch takes up more of the circumference of the tyre so for any given rotation, the sidewall has to compress more to get the contact patch on to the road. Deforming the tyre creates heat. With a longer contact patch and more sidewall deformation, the tyre spends proportionately less time cooling off than a wider tyre which has a shorter contact patch and less sidewall deformation. Why does this matter? Well because the narrower tyre has less capacity for cooling off, it needs to be made of a harder rubber compound in order to better resist heating in the first place. The harder compound has less mechanical keying and a lower coefficient of friction. The wider tyres are typically made of softer compounds with greater mechanical keying and a higher coefficient of friction. And voila – wider tyres = better grip. But not for the reasons we all thought.
WHAT ABOUT LATERAL FORCE IN CORNERING?
In terms of the lateral force applied to a tyre during cornering, you eventually come to a point where slip angle becomes important. The plot below shows an example of normalised lateral force (in Kg) versus slip angle (in degrees). Slip angle is best described as the difference between the angle of the tyres that you’ve set by steering, and the direction in which the tyres actually want to travel. As you corner the lateral force increases on your tyres, and at some point, the lateral force is going to overcome the mechanical grip of the tyres and that point is defined by the peak slip angle, as shown in the graph. ie. there comes a point at which no matter how much vertical load is applied to the tyre (from the vehicle weight), it’s going to be overcome by the lateral force and ‘break away’ and slip. So why do wider tyres perform better when cornering? Well apart from the softer rubber compound giving better mechanical keying and a higher coefficient of friction, they have lower profile sidewalls. This makes them more resistant to deforming under lateral load, resulting in a more predictable and stable contact patch. In other words, you can get to a higher lateral load before reaching the peak slip angle.

In reality, trying to figure this out using static examples and reading some internet hack’s website is all but impossible because what’s really important here is dynamic setup. In reality the contact patch is effectively spinning around your tyre at some horrendous speed. When you brake or corner, load-transfer happens and all the tyres start to behave differently to each other. This is why weight transfer makes such a difference the handling dynamics of the car. Braking for instance; weight moves forward, so load on the front tyres increases. The reverse happens to the rear at the same time, creating a car which can oversteer at the drop of a hat. The Mercedes A-class had this problem when it came out. The load-transfer was all wrong, and a rapid left-right-left on the steering wheel would upset the load so much that the vehicle lost grip in the rear, went sideways, re-acquired grip and rolled over. (That’s since been changed.) The Audi TT had a problem too because the load on it’s rear wheels wasn’t enough to prevent oversteer which is why all the new models have that daft little spoiler on the back.
If your brain isn’t running out of your ears already, then here’s a link to where you can find many raging debates that go on in the Subaru forums about this very subject. If you decide to read this, you should bear in mind that Simon de Banke, webmaster of ScoobyNet, is a highly respected expert in vehicle dynamics and handling, and is also an extremely talented rally driver. It’s also worth noting that he holds the World Record for driving sideways………..
If you decide to fatten up the tyres on your car, another consideration should be clearance with bits of your car. There’s no point in getting super-fat tyres if they’re going to rub against the inside of your wheel arches. Also, on cars with McPherson strut front suspension, there’s a very real possibility that the tyre will foul the steering linkage on the suspension. Check it first!
HOLY CRAP THAT’S COMPLICATED. ISN’T THERE A SHORTER ANSWER?
Yes.
Choose the dimensions of your tyre according to the ‘comfort/cornering speed’ ratio that suits you. Lower profile/series = more precise cornering. Higher profile/series = more comfort. To increase the contact patch, lower the tyre pressure a little.
CASTER, CAMBER, ALIGNMENT AND OTHER VOODOO
ALIGNMENT
This is the general term used to gloss over the next three points:

CASTER
This is the forward (negative) or backwards (positive) tilt of the spindle steering axis. It is what causes your steering to ‘self-centre’. Correct caster is almost always positive. Look at a bicycle – the front forks have a quite obvious rearward tilt to the handlebars, and so are giving positive caster. The whole point of it is to give the car (or bike) a noticeable centre point of the steering – a point where it’s obvious the car will be going in straight line.
CAMBER
Camber is the tilt of the top of a wheel inwards or outwards (negative or positive). Proper camber (along with toe and caster) make sure that the tyre tread surface is as flat as possible on the road surface. If your camber is out, you’ll get tyre wear. Too much negative camber (wheels tilt inwards) causes tread and tyre wear on the inside edge of the tyre. Consequently, too much positive camber causes wear on the outside edge.
Negative camber is what counteracts the tendency of the inside wheel during a turn to lean out from the centre of the vehicle. 0 or Negative camber is almost always desired. Positive camber almost always creates handling problems.
The technical reason for this is because when the tyres on the inside of the turn have negative camber, they will tend to go toward 0 camber, using the contact patch more efficiently during the turn. If the tyres had positive camber, during a turn, the inside wheels would tend to even more positive camber, compromising the efficiency of the contact patch because the tyre would effectively only be riding on its outer edge.
As a car rolls in turns, or as the suspension compresses and extends over undulations in the road, the camber changes with respect to the ground (because the suspension mounts move relative to the road surface). To try to minimise this change, and keep the tyre in the best alignment possible with the road, the suspension parts connected to the top and bottom of the wheel hub carrier are normally designed to move in a different arcs (relative to its lateral location). ie. the top control arms / McPherson strut etc. move in a different arc to the lower control arms and links. This causes a dynamic change in camber with suspension movement, meaning the more it compresses, the more it increases (typically) camber, refered to as camber gain. This counteracts the effects of the suspension mounting points moving in relation to the road.
TOE IN & OUT
‘Toe’ is the term given to the left-right alignment of the front wheels relative to each other. Toe-in is where the front edge of the wheels are closer together than the rear, and toe-out is the opposite. Toe-in counteracts the tendency for the wheels to toe-out under power, like hard acceleration or at motorway speeds (where toe-in disappears). Toe-out counteracts the tendency for the front wheels to toe-in when turning at motorway speeds. It’s all a bit bizarre and contradictory, but it does make a difference. A typical symptom of too much toe-in will be excessive wear and feathering on the outer edges of the tyre tread section. Similarly, too much toe-out will cause the same feathering wear patterns on the inner edges of the tread pattern.
Toe-in is also used to counter act the tyre wear of negative camber. A general rule of thumb for passenger cars would be around 2mm toe-in per ¼° camber for zero tyre wear.
.A reader of my site emailed me this which is a nice description of toe-in and toe-out.
As a front-wheel-drive car pulls itself forwards, the wheels will tend to pivot arount the king-pins, and thus towards the center of the car. To ensure they end up straight ahead, they should sit with a slight toe-out when at rest.
A rear-wheel-drive car pushes itself forward, and the front wheels are rotated by friction… thus they will tend to want to trail the king-pins, and therefore will want to splay apart. To ensure that they run parallel when rolling, they should be given some toe-in when at rest.
The perfect 4WD car will have neutral pressure on the front wheels, so have neither toe-in or toe-out… however very few companies make the perfect 4WD, so some will have a small amount to toe-in/out, depending on the dominant axle.
ROTATING YOUR TYRES
This is the practice of swapping the front and back tyres to even out the wear, not the practice of literally spinning your tyres around (you’d be surprised how often people seem to get confused by this). I used to believe that this wasn’t a good idea. Think about it: the tyres begin to wear in a pattern, however good or bad, that matches their position on the car. If you now change them all around, you end up with tyres worn for the rear being placed on the front and vice versa. However, having had this done a few times both on front-wheel drive and all-wheel-drive vehicles during manufacturer services, I’ a bit of a convert. I now reckon it actually is A Good Thing. It results in even overalltyre wear. By this, I mean wear in the tread depth. This is a valid point, but if you can’t be bothered to buy a new pair of tyres when the old pair wear too much, then you shouldn’t be on the road, let alone kidding yourself that putting worn front tyres on the back and partly worn back tyres on the front will cure your problem.
So how should you rotate your tyres? It depends on whether you have 2-, 4-, front- or rear-wheel drive, and whether or not you have unidirectional tyres (meaning, those with tread designed only to spin in one direction). With unidirectional tyres, you can swap the front and rear per-side, but not swap them side-to-side. If you do, they’ll all end up spinning the wrong way for the tread. Generally speaking you ought to rotate your tyres every 5,000 miles (8,000km) or so, even if they’re showing no signs of wear. The following table shows the correct way to rotate your tyres. (Click any image to bring up larger versions with descriptions)
 |
 |
 |
 |
DIAGNOSING PROBLEMS FROM TYRE WEAR
Your tyre wear pattern can tell you a lot about any problems you might be having with the wheel/tyre/suspension geometry setup. The first two signs to look for are over- and under-inflation. Whilst this used to be a problem on older tyres, modern radials have much stiffer carcasses but even so, you might still be able to spot the following:
![[wear]](http://www.carbibles.com/images/wear_patterns.jpg)
Here’s a generic fault-finding table for most types of tyre wear if you can spot them:
| Problem | Cause |
|---|---|
| Shoulder Wear Both Shoulders wearing faster than the centre of the tread |
|
| Under-inflation | |
| Repeated high-speed cornering | |
| Improper matching of rims and tyres | |
| Tyres haven’t been rotated recently | |
| Centre Wear* The centre of the tread is wearing faster than the shoulders |
|
| Over-inflation | |
| Improper matching of rims and tyres | |
| Tyres haven’t been rotated recently | |
| One-sided wear One side of the tyre wearing unusually fast |
|
| Improper wheel alignment (especially camber) | |
| Tyres haven’t been rotated recently | |
| Spot wear A part (or a few parts) of the circumference of the tread are wearing faster than other parts. |
|
| Faulty suspension, rotating parts or brake parts | |
| Dynamic imbalance of tyre/rim assembly | |
| Excessive runout of tyre and rim assembly | |
| Sudden braking and rapid starting | |
| Under inflation | |
| Diagonal wear A part (or a few parts) of the tread are wearing diagonally faster than other parts. |
|
| Faulty suspension, rotating parts or brake parts | |
| Improper wheel alignment | |
| Dynamic imbalance of tyre/rim assembly | |
| Tyres haven’t been rotated recently | |
| Under inflation | |
| Feather-edged wear The blocks or ribs of the tread are wearing in a feather-edge pattern |
|
| Improper wheel alignment (faulty toe-in) | |
| Bent axle beam |
*There is an interesting “but wait” issue with the centre tread wear example above. This effect can happen even when the pressures have been religiously maintained and might be due to centrifugal throwout of the centre of the tyre carcass rather than underinflation. This problem would most likely show itself on high performance vehicles with wide section tyres. I’ve had a couple of emails on this particular topic, so go ahead and think it over, and either stuff a question in the forum or contact me directly if you have any better ideas.
CHECKING YOUR TYRES
It’s amazing that so many people pay such scant attention to their tyres. If you’re travelling at 70mph on the motorway, four little 20-square-centimetre pads of rubber are all that sits between you and a potential accident. If you don’t take care of your tyres, those contact patches will not be doing their job properly. If you’re happy with riding around on worn tyres, that’s fine, but don’t expect them to be of any help if you get into a sticky situation. The key of course, is to check your tyres regularly. If you’re a motorcyclist, do it every night before you lock the bike up. For a car, maybe once a week. You’re looking for signs of adverse tyres wear (see the section above). You’re looking for splits in the tyre sidewall, or chunks of missing rubber gouged out from when you failed to negotiate that kerb last week. More obvious things to look for are nails sticking out of the tread. Although if you do find something like this, don’t pull it out. As long as it’s in there, it’s sealing the hole. When you pull it out, then you’ll get the puncture. That doesn’t mean I’m recommending you drive around with a nail in your tyre, but it does mean you can at least get the car to a tyre place to get it pulled out and have the resulting hole plugged. The more you look after your tyres, the more they’ll look after you.
LIES, DAMN LIES, AND TYRE PRESSURE GAUGES
Whilst on the subject of checking your tyres, you really ought to check the pressures once every couple of weeks too. Doing this does rather rely on you having, or having access to a working, accurate tyre pressure gauge. If you’ve got one of those free pencil-type gauges that car dealerships give away free, then I’ll pop your bubble right now and tell you it’s worth nothing. Same goes for the ones you find on a garage forecourt. Sure they’ll fill the tyre with air, but they can be up to 20% out either way. Don’t trust them. Only recently – since about 2003 – have I been able to trust digital gauges. Before that they were just junk – I had one which told me that the air in my garage was at 18psi with nothing attached to the valve. That’s improved now and current-generation digital gauges are a lot more reliable. One thing to remember with digital gauges is to give them enough time to sample the pressure. If you pop it on and off, the reading will be low. Hold it on the valve cap for a few seconds and watch the display (if you can).

Generally speaking you should only trust a decent, branded pressure gauge that you can buy for a small outlay – $30 maybe – and keep it in your glove box. The best types are the ones housed in a brass casing with a radial display on the front and a pressure relief valve. I keep one in the car all the time and it’s interesting to see how badly out the other cheaper or free ones are. My local garage forecourt has an in-line pressure gauge which over-reads by about 1.5psi. This means that if you rely on their gauge, your tyres are all 1.5psi short of their recommended inflation pressure. That’s pretty bad. My local garage in England used to have one that under-read by nearly 6 psi, meaning everyone’s tyres were rock-hard because they were 6psi over-inflated. I’ve yet to find one that matches my little calibrated gauge.
One reader pointed something else out to me. Realistically even a cheap pressure gauge is OK provided it is consistent. This is easy to check by taking three to five readings of the same tyre and confirming they are all the same, then confirming it reads (consistently) more for higher pressure and less for lower pressure.
One last note : if you’re a motorcyclist, don’t carry your pressure gauge in your pocket – if you come off, it will tear great chunks of flesh out of you as you careen down the road….
TYRE PRESSURE AND GAS-MILEAGE
For the first two years of our new life in America, I’d take our Subaru for its service, and it would come back with the tyres pumped up to 40psi. Each time, I’d check the door pillar sticker which informed me that they should be 32psi front and 28psi rear, and let the air out to get to those values. Eventually, seeing odd tyre wear and getting fed up of doing this, I asked one of the mechanics “why do you always over-inflate the tyres?” I got a very long and technical response which basically indicated that Subaru are one of the manufacturers who’ve never really adjusted their recommended tyre pressures in line with new technology. It seems that the numbers they put in their manuals and door stickers are a little out of date. I’m a bit of a skeptic so I researched this on the Internet in some of the Impreza forums and chat rooms and it turns out to be true. So I pumped up the tyres to 40psi front and rear, as the garage had been doing, and as my research indicated. The result, of course, is a much stiffer ride. But the odd tyre wear has gone, and my gas-mileage has changed from a meagre 15.7mpg (U.S) to a slightly more respectable 20.32 mpg (U.S). That’s with mostly stop-start in-town driving. Compare that to the official quoted Subaru figures of 21mpg (city) and 27mpg (freeway) and you’ll see that by changing the tyre pressures to not match the manual and door sticker, I’ve basically achieved their quoted figures.
So what does this prove? Well for one it proves that tyre pressure is absolutely linked to your car’s economy. I can get an extra 50 miles between fill-ups now. It also proves that it’s worth researching things if you think something is a little odd. It does also add weight to the above motto about not trusting forecourt pressure gauges. Imagine if you’re underfilling your tyres because of a dodgy pressure gauge – not only is it dangerous, but it’s costing you at the pump too.
WHAT’S THE “CORRECT” TYRE PRESSURE?
How long is a piece of string?
Seriously though, you’ll be more likely to get a sensible answer to the length of a piece of string than you will to the question of tyres pressures. Lets just say a good starting point is the pressure indicated in the owner’s manual, or the sticker inside the driver’s side door pillar. I say ‘starting point’ because on every car I’ve owned, I’ve ended up deviating from those figures for one reason or another. On my Subaru Impreza, as outlined above, I got much better gas mileage and no difference in tyre wear by increasing my pressures to 40psi. On my Honda Element, I cured the vague handling and outer-tyre-edge wear by increasing the pressures from the manufacturer-recommended 32/34psi front and rear respectively, to 37psi all round. On my Audi Coupe I cured some squirrelly braking problems by increasing the pressure at the front from 32psi to 36psi. On my really old VW Golf, I cured bad fuel economy and vague steering by increasing the pressures all-round to 33psi.
So what can you, dear reader, learn from my anecdotes? Not much really. It’s pub-science. Ask ten Subaru Impreza owners what they run their tyres at and you’ll get ten different answers. It depends on how they drive, what size wheels they have, what type of tyres they have, the required comfort vs. handling levels and so on and so forth. That’s why I said the sticker in the door pillar is a good starting point. It’s really up to you to search the internet and ask around for information specific to your car.
THE MAX. PRESSURE -10% THEORY.
Every tyre has a maximum inflation pressure stamped on the side somewhere. This is the maximum pressure the tyre can safely achieve under load. It is not the pressure you should inflate them to.
Having said this, I’ve given up using the door pillar sticker as my starting point and instead use the max.pressure-10% theory. According to the wags on many internet forums you can get the best performance by inflating them to 10% less than their recommended maximum pressure (the tyres, not the wags – they already haves inflated egos). It’s a vague rule of thumb, and given that every car is different in weight and handling, it’s a bit of a sledgehammer approach. But from my experience it does seem to provide a better starting point for adjusting tyre pressures. So to go back to my Subaru Impreza example, the maximum pressure on my Yokohama tyres was 44psi. 10% of that is 4.4, so 44-4.4=39.6psi which is about where I ended up. On my Element, the maximum pressure is 40psi so the 10% rule started me out at 36psi. I added one more to see what happened and it got better. Going up to 38psi and it definitely went off the boil, so for my vehicle and my driving style, 37psi on the Element was the sweet spot.
THE OTHER ALTERNATIVE – DON’T MESS WITH YOUR PRESSURES AT ALL
So – raising the pressure can extend a tyre’s life because there is now less rubber contact with the road, the tyre is stiffer and therefore heats up less so lasts longer and less friction with the road gives greater MPG. Also, less sidewall flex will give a more positive feeling of steering accuracy but it can result in less ultimate grip and sudden unexpected loss of grip at the limit of adhesion. Raising or lowering tyre pressures too much either side of manufacturers recommendations could be at the expense of a less safe, more uncomfortable vehicle. So should we take all vehicle manufacturers recommendations as being absolutely correct? Remember that thousands of hours go into the development and testing of a car. If you’ve dicked around with your tyre pressures and still don’t think it’s right, go back to the door pillar sticker and try that again – you could be surprised.
Like the site? The page you’re reading is free, but if you like what you see and feel you’ve learned something, a small donation to help pay down my car loan would be appreciated. Thank you.
NITROGEN INFLATION

Nitrogen inflation (nitrogen filled tyres) is one of those topics that gets discussed in car circles a lot. Some people swear by it, whilst others consider it to be an expensive rip off. So what’s the big idea? Well there are two common theories on this.
Theory 1: nitrogen molecules are larger than oxygen molecules so they won’t permeate through the rubber of the tyre like oxygen will, and thus you’ll never lose pressure over time due to leakage. The fact is any gas will leak out of a tyre if its at a higher pressure than the ambient pressure outside. The only way to stop it is a non-gas-permeable membrane lining the inside of the tyre.
The science bit: Water is about half the size of either nitrogen or oxygen, so it might diffuse out of the tyre faster, but it would have to be much, much faster to make a difference. Tyres can leak 1-2 psi a month at the extreme end of the scale although it’s not clear how much of that is by permeation through the rubber, and how much is through microscopic leaks of various sorts. For a racing tyre to lose significant water during its racing lifetime (maybe an hour or so for Formula 1), the permeation rate would have to be hundreds of times faster than oxygen or nitrogen, so that pretty much cancels out the idea that it’s the molecule size that makes the difference.
Theory 2: Nitrogen means less water vapour. This is more to do with the thermal properties than anything else. Nitrogen is an inert gas; it doesn’t combust or oxidise. The process used to compress nitrogen eliminates water vapor and that’s the key to this particular theory. When a tyre heats up under normal use, any water vapour inside it also heats up which causes an increase in tyre pressure. By removing water vapor with a pure nitrogen fill, you’re basically going to allow the tyre to stay at a more constant pressure irrespective of temperature over the life of the tyre. In other words, your tyre pressures won’t change as you drive.
The science bit: The van der Waals gas equation provides a good estimate for comparing the expansions of oxygen and nitrogen to water. If you compare moist air (20°C, 80% RH) to nitrogen, you’ll find that going up as far as 80°C results in the moist air increasing in pressure by about 0.01 psi less per litre volume than nitrogen. Moist air will increase in pressure by 7.253psi whereas nitrogen will increase in pressure by 7.263psi. Even humid air has only a small amount of water in it (about 2 mole % which means about 2% by volume), so that all puts a bit of a blunt tip on the theory that it’s the differences in thermal expansion rates that give nitrogen an advantage. In fact it would seem to suggest that damp air is marginally better than nitrogen. Go figure.
So which option is right – smaller molecules, or less water vapour? It would seem neither. A reader of this site had a good thought on the whole nitrogen inflation thing. He wrote: Some racing driver with a scant understanding of chemistry and physics thought that nitrogen would be better because (insert plausible but incorrect science here) and he started using it in his tyres. He won some races and word got out about the nitrogen fill. Nitrogen isn’t significantly more expensive to use than plain old air, so pretty soon everyone was doing it.
Hey, until I hear a reason that makes good scientific sense, this explanation seems just as good.

Nitrogen inflation is nothing new – the aerospace world has been doing it for years in aircraft tyres (you don’t want the water content of air-filled tyres to freeze to ice in-flight – it makes the tyres horribly unbalanced for landing). Racing teams will also often use nitrogen inflation, but largely out of convenience rather than due to any specific performance benefit, which would tend to fit with the armchair science outlined above. Nitrogen is supplied in pressurised tanks, so no other equipment is needed to inflate the tyres – no compressors or generators. Apart from that Nitrogen won’t provide fuel in the event of a pit lane fire whereas compressed oxygen tanks do, so there’s a safety issue at play too. (Remember Jos Verstappen’s pit lane fire in 1994?)
So does it make a difference to drivers in the real world? Well consider this; The air you breathe is already made up of 78% nitrogen. The composition is completed by 21% oxygen and tiny percentages of argon, carbon dioxide, neon, methane, helium, krypton, hydrogen and xenon. The kit that is used to generate nitrogen for road tyres typically only gets to about 95% purity. To get close to that in your tyres, you’d need to inflate and deflate them several times to purge any remaining oxygen and even then you’re only likely to get about 90% pure nitrogen. So under ideal conditions, you’re increasing the nitrogen content of the gas in the tyre from 78% to 90%. Given that nitrogen inflation from the average tyre workshop is a one-shot deal (no purging involved) you’re more likely to be driving around with 80% pure nitrogen than 90%. That’s a 2% difference from bog standard air. On top of that, nitrogen inflation doesn’t make your tyres any less prone to damage from road debris and punctures and such. It doesn’t make them any stronger, and if you need to top them up and use a regular garage air-line to do it, you’ve diluted whatever purity of nitrogen was in the tyres right there. For $30 a tyre for nitrogen inflation, do you think that’s worth it? For all the alleged benefits of a nitrogen fill, you’d be far better off finding a tyre change place that has a vapour-elimination system in their air compressor. If they can pump up your tyres with dry air, you’ll get about the same benefits as you would with a nitrogen inflation but for free.
TPMS – TYRE PRESSURE MONITOR SYSTEMS
For car nerds who live in America, you’ll no doubt remember the Ford Explorer / Firestone Bridgestone lawsuits of the early 21st century. A particular variety of Firestone tyre, sold as standard on Ford Explorers, had a nasty knack of de-laminating at speed causing high-speed blowouts, which, because the Explorer was an S.U.V, resulted in high-speed rollover accidents. After the smoke cleared, it turned out that the tyres were particularly susceptible to running at low-pressure. Where most tyres could handle this, the Firestones could not, heated up, delaminated and blammo – instant lawsuit.
THE NHTSA RULING
The American National Highways and Transport Safety Association made some sweeping regulatory changes in 2002 because of the Ford Explorer case. Section 13 of the Transportation Recall Enhancement, Accountability and Documentation (TREAD) Act, required the Secretary of Transportation to mandate a warning system in all new vehicles to alert operators when their tyres are under inflated.
After extensive study, NHTSA determined that a direct tyre pressure monitoring system should be installed in all new vehicles. In a “return letter” issued after meetings with the auto industry, the Office of Management and Budget (OMB) demurred, claiming its cost-benefit calculations provided a basis for delaying a requirement for direct systems. The final rule, issued May 2002, would have allowed auto makers to install ineffective TPMS and would have left too many drivers and passengers unaware of dangerously underinflated tyres. The full text of the various rulings and judgments, along with a lot more NHTSA information on the subject can be found at this NHSA link.
TPMS IN EUROPE
In stark contrast to the lawsuit-induced TPMS laws in America, in Europe, TPMS is mandated on all vehicles built from 2010 onwards primarily for running costs. Tyres run at the correct pressure save money. Simple. The safety issue is involved in the EU law too but it’s not the driving factor (pun entirely intended).
INDIRECT TPMS
Indirect TPMS works without actually changing anything in the wheel or tyre. It relies on a component of the ABS system on some cars – the wheel speed sensors. Indirect TPMS reads the wheel speeds from all 4 ABS sensors and compares them. If one wheel is rotating at a different rate to the other three, it means the tyre pressure is different and the onboard computer can warn you that one tyre is low. Indirect systems don’t work if you’re losing pressure in all four tyres at the same rate because there is no differential between the rotations. Typically losing pressure in all tyres at once is a result of either incredibly bad luck or driving over a police spike strip.
CURRENT / FIRST / SECOND GENERATION DIRECT TPMS.
Picture credit: SmarTire

The current generation of direct tyre pressure monitoring systems all work on the same basic principle, but have two distinctly different designs. The idea is that a small sensor/transmitter unit is placed in each wheel, in the airspace inside the tyre. The unit monitors tyre pressure and air temperature, and sends information back to some sort of central console for the driver to see. This is a prime example of trickle-down technology from motor racing. Formula 1 teams have been using this technology for years and now it’s coming to consumer vehicles.
At its most basic, the system has one or more lights in the cabin and/or a buzzer or some other sound. When one of the tyre pressure monitors registers over-temperature or under-inflation, the driver is alerted by a sound and a light indicating the problem. On more up-market systems, the indicator will show which tyre has the problem.
Strap-on sensors.
Strap-on type sensors were used primarily by Ford up to 2010 when they abandoned them. They’re about the size of your thumb and clamp to the inside of the wheel rim with a steel radial belt. SmarTire manufacture an aftermarket kit that can be fitted to most vehicles. Typically these sensors weigh in at about 42g (about 1½ ounces) and the load is centred on the wheel rim. Normal wheel-balancing procedures can compensate for these devices. The downside is that you have the potential for the steel strap to fail and start flailing about inside your tyre, and if you do get a flat, the location of the sensor means it could be crushed and destroyed. With the Ford variants, they were designed to sit inside the drop-centre in the rim so they shouldn’t be crushed if the tyre goes flat.
Picture credit: Autodax

Valve-stem sensors.
The second type of sensor is a small block which forms part of the inside of the tyre valve stem. It’s a little smaller than the strap-on type and doesn’t have the associated steel band to go with it. Manufacturers include Autodax TRW Automotive and Pacific Industrial Corp. These sensors are lighter and weigh about 28g (an ounce). Because they are smaller and are part of the valve stem itself, they are mounted to one side of the wheel rim. Regular wheel-balancing can account for this weight. There are two types, rubber and metal. Rubber was first used by General Motors beginning in 2007, and have been adopted by Ford and Chrysler in 2010. Metal is used by almost all other manufacturers, including Nissan, Toyota, Honda, Land Rover, Porsche, etc. There are two subsets of the Metal Stem; ones that are permanently attached to the plastic sensor, and ones that are replaceable. The replaceable stems are only used on Honda and Acura vehicles as far as I know. Since the metal stems seal with a rubber grommet, this should be replaced when a new tyre is mounted on the rim. The same applies to the rubber stem style TPMS Sensors. There are some disadvantages / things to be aware of if your vehicle has this type of sensor though:
- Because of its proximity to the side of the wheel, a ham-fisted tyre-changer can easily destroy the sensor with the machine that is used to take tyres off the rims.
- Same goes for the valve stem – because its metal and part of the entire TPMS assembly, if the valve stem gets dinged or broken, you need a whole new unit.
- When re-fitting the tyres, the tyre bead itself, if not correctly located, can crush the sensor.
- Because the valve passes through the TPMS unit, you can’t use quick-seal aerosol type flat tyre remedies because the gunk screws up the transmitters.
- Because the valve stem is metal, using the wrong type of metal dust cap can cause a chemical reaction which can corrode the valve stem and/or dust cap. Similarly if the tyre-change facility doesn’t use a nickel-plated valve core, that can corrode and get stuck inside.
To compensate for some of the problems listed above, you can also get snap-in type TPMS sensors which have the metal block on the inside of the wheel rim, but with a replacable, snap-in rubber valve stem.


Dust-cap sensors.
The third type of sensor is perhaps the easiest to use as an add-on item. PressurePro sell a system where the sensors are actually built in to the dust caps that you screw on to your tyre valves. In their system, the in-car monitor ($199 at the time of writing) plugs into the 12v accessory socket so it requires no in-vehicle wiring. The PressurePro sensors send readings to the in-car unit every 7 seconds via wireless RF. The system alerts you if the pressure in any tyre drops 12.5% below its baseline pressure – the pressure the tyre was at when the sensor cap was first screwed on. 12.5% is actually quite a lot. For a passenger car tyre running at 34psi, 12.5% represents a drop of 4.25; psi. Whilst that’s definitely into the danger zone – the reason for TPMS in the first place – a drop of 1psi is enough to begin to affect tyre temperature and gas mileage. Note: the PressurePro system doesn’t monitor tyre temperature.
One concern I had about this system was the construction of their dustcaps themselves. Built wrong, they could cause the one thing they’re designed to prevent – tyre deflation. How? In order for the dustcap-monitor to work, it has to hold the valve stem open once it is screwed on (see also The Low Tech Approach below). If the unit should crack or break under duress whilst it is holding the valve stem open, it could lead to tyre deflation. After speaking to a PressurePro rep, he informed me that there are three failsafes built into the dustcap to prevent this from happening, even if the cap itself begins to distort. The caps are tested up to 300°F (148°C) and down to -40°F (-40°c) for distortion and brittle fracture. Each cap costs $50 retail at the time of writing, so judge for yourself if they’re likely to be built better than the low tech approach which cost $19 for four. See the product review page for my test of the PressurePro system.
Picture credit: SmarTire

Driver displays.
As I mentioned above, the driver displays range from the über simple buzzer and light, to items which would look at home on the bridge of the starship Enterprise. In the SmarTire picture above, you can see their sensor has 4 lights on it to the right of the box – an example of the basic system. The Autodax image shows a more complex system which shows actual pressures and temperatures as well. SmarTire have a second generation display available now which shows a graphic representation of the vehicle along with the problem tyre. Their new system can be set to trigger at specific temperatures and inflation pressures. For example it can go off when the tyre gets too hot, when the pressure goes below a set threshold, or the pressure gets a specified amount below the “starting” pressure (eg if it loses 1psi of pressure). This is SmarTire’s second-generation display showing some of their operating modes:
The limits of what TPMS can do.
All TPMS systems have limits. These are usually around ±1.5 PSI/.1 BAR in pressure accuracy, and ±5.4°F/3°C temperature accuracy. They cannot warn you of an impending blowout. Tyre blowouts are caused by instantaneous failure of the tyre. However they can tell you about the symptoms that lead to blowouts, and that is the primary reason for having TPMS. Tyre failures are usually preceded by long periods of running at lower-than-acceptable pressures – TPMS would warn you about that. When the tyre pressure is low, the sidewall flexes a lot more, generating more heat – TPMS can tell you about that too.
Typically, tyre pressure is transmitted as soon as your vehicle starts moving. Pressure data is then transmitted every 4-6 minutes randomly, although the sensors read tyre pressure every 7 seconds or so. If the new pressure reading differs from the last transmitted pressure by more than 3 PSI/.21 BAR, then the data is transmitted immediately to alert you of a problem. In some systems, the car’s onboard computer has preset limits so rather than measuring a change, the system simply alerts you when one of the tyres drops below the preset limit.
Tyre temperature is also normally transmitted as soon as the vehicle starts moving. As with pressure data, temperature data is then transmitted every 4-6 minutes randomly. Again the sensors will read the temperature more frequently, however the system will only alert you if the temperature exceeds 80°C/176°F.
The down-side of current TPMS.
TPMS sensors need power to work. All the current sensors use batteries. Whilst these are rated for about 5 years use, or 250,000 miles, the batteries are not replaceable in any system. The manufacturers don’t want a battery cover to come loose and start zipping around inside your tyre. For one it is dangerous to the inside of the tyre and for another, if the battery compartment opened, the battery would come out and you’d lose all sensor data for that wheel. As a result, the batteries are built-in to the sealed unit during manufacture. If you get a dead sensor, you need to buy a whole new one. Also, you know what batteries are like in extreme cold and extreme hot – bear that in mind if you regularly park in snow and ice….
Currently, there are no laws mandating manufacture dates to be put on these third-party systems. So if you buy one from a store, it could be brand new, or it could have been sitting on the shelf for a year. You’ve been warned.

Rotating your tyres or using snow tyres – what you need to know when using TPMS.
All factory-fit TPMS systems are registered at the factory to the vehicle. The onboard computer stores a unique transponder ID for each unit along with its position on the car – front left or right, rear left or right for example. If you change wheels in the winter to wheels with snow tyres on them, you either need to move the TPMS sensors to the corresponding new wheels, or have a duplicate set. Same goes for rotating your tyres – if you do front to back rotation for example, the car’s computer still reads the TPMS signals but the sensors it believes are on the front are now on the rear and vice versa. For vehicles with even tyre pressures all around, this makes no difference unless you have a system which can tell youwhich tyre is deflating. If you have a vehicle where the front pressures are supposed to be lower than the rear, the onboard pressure limits will be set accordingly and the underinflation alarms will be skewed. Particularly at the front – the sensors will be expecting higher pressure because they’re registered as being on the rear wheels. You could end up with a constant TPMS alarm.
So how to get around this? There is no easy way. Some vehicles have onboard re-learning capabilities, where you can get the vehicle into a mode where you can teach it the location of the sensors in a particular order. Others require reprogramming through the OBDII port. Either way you need specialist equipment (such as those sold by Bartec) to stimulate the TPMS transponders in order and then reprogram the vehicle accordingly. The general procedure starts at the front left tyre once the vehicle is in ‘learn’ mode and then works clockwise around it. For wireless type reprogramming, the vehicle waits for the first transponder code, which it receives when you stimulate the sensor using the special tool, then waits for the second code and so on. For wired-type reprogramming, the tool stores the 4 transponder codes in order then uploads them to the car’s computer once connected through the OBD II port.
It’s something to bear in mind if you have TPMS on your vehicle – winter wheels, tyre rotations – anything that moves a sensor from it’s pre-registered location on the vehicle – can cause problems.
Picture credit: Bartec
NEXT-GENERATION TPMS.
Several companies are working on the battery problem for the sensor modules. As I mentioned above, the basic pitfall of all existing systems is that at some point, the battery will wear out, and you’ll need a new sensor. There are a few competing, emerging technologies right now trying to tackle the problem of perfecting transmitter-sensors that don’t require a battery..
The Pera Piezotag system relies on the inherent properties of piezoelectric materials – that is a material which generates current when pressure is applied to it. The inside of a tyre is constantly at pressure so it seems reasonable that a correctly-manufactured piezoelectric wafer could generate enough current to operate the sensor just from the pressure inside the tyre.
The ALPS Batteryless TPMS system (licenced from IQ Mobil, a small German R&D company) is similar to an RFID chip in that it gets its power from the radio signal which interrogates it. Current systems, (including the Pera proposal) are classified as “active” transmitter / receiver systems. The sensors transmit signals of their own accord and the in-car receiver picks them up. The ALPS system is a “passive” RFID transceiver system. The sensors remain dormant and un-powered until the in-car transceiver sends a high-power short-range radio signal out which basically carries a “tell me your status” command. The RF power in the radio signal is enough to cause the RFID unit in the sensor to power up, take a reading, transmit it and power down. Clever eh? The downside of this system is that it’s likely to be pricey compared to others coming to the market. There are 9 pcbs in their system; one in each wheel, one in each wheel arch and one in the console.
Transense Technologies in England are licensing their technology to SmarTire, Michelin and Honeywell. Unlike the Alps system, Transense’s system has only one PCB and employs passive surface acoustic wave sensors (piezo-based again) at the inner end of each tyre valve. Their sensors monitor both pressure and temperature. It’s worth noting that Transense hold the patent for resonant SAW technology which expires in 2019. Pera were exposed to this technology in the early 90’s and have since come out with their own Piezotag system (see above). Coincidence?
Michelin has an inductive (125kHz) system for trucks developed for them by TI, Goodyear and Siemens have a similar technology system for passenger cars. Qinetic (formerly DERA / RAE Farnborough) also have an offering.
THE LOW-TECH APPROACH.

If all this electronic wizardry seems too much for you, you can always go to the low-tech approach. Valve-cap pressure sensors. These are available over-the-counter at just about any car parts store and are about as simple a device as you can get. You inflate your tyre, and replace the dust cap on the valve with one of these. If it shows green, you’re OK. If it shows yellow, your tyres have lost some pressure. If it shows red, your tyres are dangerously underinflated. This system does of course require you to walk around the car and check each time you want to drive off.
There are some drawbacks to this system which you should be aware of. For the pressure sensor to read the tyre pressure, it has to depress the valve stem when its screwed on. This means that the tyre valve is no longer the thing keeping the air in your tyre – it’s now the seal between this pressure cap and the screw threads. If it’s not snug, it will leak slowly and let air out of your tyre. Secondly, there’s the question of balance. If you use these screw-on caps, you should get your wheels re-balanced afterwards because it’s adding weight to the rim. Third there’s the question of durability – it’s better for one of these things to come off completely if you hit a pothole because then the valve stem will re-seal. If you crack the pressure cap, you’ll let all the air out of the tyre very quickly. And finally, the question of accuracy. Typically these things are very coarse in their readings. A “yellow” signal might not appear until you’re 4psi down, and it might not show red until you’re as much as 8psi down. Even 1psi can be a problem so 4psi or 8psi is dangerously underinflated.
THE ULTRA-LOW-TECH APPROACH, AND WHY ALL THIS MONEY IS BEING SPENT IN THE FIRST PLACE.
Drivers are lazy. That is the very simple reason that all these companies are burning off millions in R&D budgets, sales and marketing. If we all checked our tyre pressures once a week using one of the tyre pressure gauges mentioned above, we’d know if there was a problem brewing. That is the ultra-low-tech approach. The problem is that 90% of drivers don’t ever bother to check their tyres. They either rely on their servicing mechanic or garage to do it for them, or they rely on blind dumb luck. For as long as uneducated people drive around blissfully unaware of the latent danger in their tyres, governments and safety regulators will mandate TPMS. The real question is this : given how unaware some drivers are of their surroundings and their instruments (think of the number of people you see driving with their indicators on on the motorway, or with their fog lights on in bright sunshine) do we really believe that an extra warning light in the vehicle is going to make any difference? Probably not. The key is that if the system was installed, and it worked, and the driver ignored it, then the car, wheel and tyre manufacturers can no longer be held accountable for blowouts and rollovers.
taken from- http://www.carbibles.com/tyre_bible_pg3.html#20070703