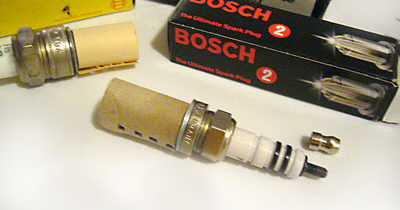
Lots of things have changed in recent decades when you talk about the “tune-up.” Back when the phrase was coined, you had to get under the hood with screwdrivers and do things like adjust ignition points, replace condensors, set engine timing and change your spark plugs. Wait, we can still change the spark plugs!

It’s one of the last surviving elements of the classic tune-up. Most cars still have a spark plug or 8 in there someplace, and even today’s technology hasn’t stopped them from wearing out. It’s an easy maintenance procedure that can make your car run more smoothly and increase your gas mileage.
What is a spark plug? Basically it’s a high voltage bridge for electricity. When the electricity crosses the “bridge” (which is actually a gap between two contact points) inside your engine, the spark it makes ignites the gas vapors, which makes the engine go putt putt. How long they can do this without being replaced depends on lots of things. The condition of your engine, the purity of the fuel you’re using, even your driving habits can affect the life of the plugs.
ratchet wrench 1/2″
12-inch socket extension
spark plug socket for your car
Like I said, it’s not too complex, but don’t forget tofollow the directions in order!


Starting at the end of the row, pull the wire off the end of the spark plug by grasping it as close to the engine as possible then pulling. You might have to give it a little wiggle to get it off. If you have a 4-cylinder engine with the plug wires going into the top, your plugs might be at the bottom of a hole (if you have a dual over head cam top end configuration). If this is the case, just pull straight up and you’ll pull a long rubber boot out of the hole.

If for some reason your socket doesn’t have the gripper in there, you can improvise. Cut off a half inch or less of electrical or masking tape and stick it onto the inside of the clean socket. This will make the socket grip a little more tightly on the spark plug so you can hold onto it.
With your ratchet wrench set to loosen (that’s counter-clockwise) slide it over the end of the plug, being sure to push it on as far as it will go. Now remove the old plug. I recomend spending the 5 buck for an actual Spark Plug Socket with the rubber grip on the inside.
Finally, take a look at how the end you pulled the plug wire off is set up. Some will just be threaded like a screw, and others will have a large metal cap on the end. Be sure your new plugs are set up like the old ones were.

But don’t I have to set the gap with one of those fun tools?
These days you order plugs specifically for your car, and they come already gapped. I know some die-hards out there will strongly disagree (here come the e-mails) but I have never opened a new spark plug and had to reset the gap, never!
Put the plug-wire end of the plug in the socket and, holding just the extension, push it all the way in. Now carefully guide the spark plug into the hole. Try not to ram it in or bang it on anything because this can screw up the gap or damage the plug. With it sitting in the hole, begin to screw the new plug in by hand. Starting them off by hand instead of using the wrench will keep you from accidentally cross-threading one of the plugs. Screw it in by hand until it stops, then put the wrench on the end and tighten it snugly. If you have a torque wrench, you can torque it to spec, but if you don’t, just make it tight without overdoing it. The metal in there is soft and can be damaged by overtightening. If you are pulling hard enough to make a sound come out of your mouth, like a grunt, you’re overdoing it.

*If you decided not to listen and pulled all the wires off at once, you might have mixed up the plug wires. You’ll know if you did because it either won’t start, will run really rough, or if you’re very unlucky you’ll hear a deafening backfire. Now you have to go and look up your engine’s firing order, correspond that to the points on the distributor cap after you set the engine to Top Dead Center and put them all back on. Doesn’t it sound easier to replace them one at a time?

